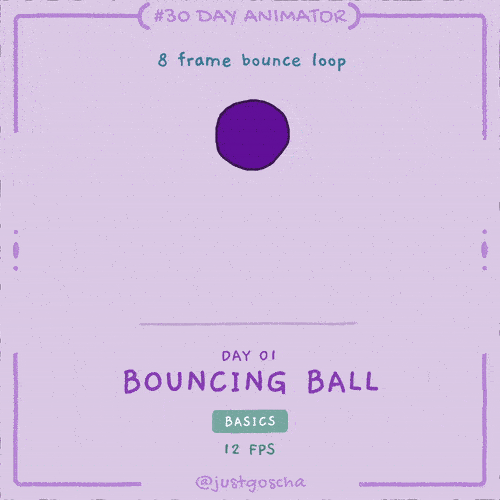
Day 1
Bouncing Ball
Hey animators 👋
Here we are on the first day of this animation journey, I hope you have your digital pencils sharpened for the first exercise. It’s a classic!
The Bouncing Ball
If you are familiar with animation, maybe even have animated in the past, then you have encountered the bouncing ball before.
It’s popular for a reason. It’s pretty simple, and at the same time it’s packed with many fundamental principles of animation, like
- Timing
- Spacing
- Easing
- Squash & Stretch
Whenever I struggle to animate character actions that seem complex, I often return to this most basic of exercises to plan out the action. In the end, most of what we animators do can be traced back to a bouncing ball 😊
There are 3 exercises that I would like you to do for this one. They are all short and build on each other:
And if you are an advanced animator or bored with the bouncing ball exercise go ahead and just animate the BONUS exercise:
Now there are TWO ways you can approach all exercises → You can go in blind and attempt to animate it right away. Then come back and read how I would do it.
OR
You continue reading and get the full breakdown of how I would approach this animation.
There is no right or wrong way. Do whatever suits your learning style! 😊
⌛ Don’t forget to set a timer and try to finish in 60min.
You can always share your creations on social media, add the #30DayAnimator hashtag!
If you purchased the 🟣 Full Experience or 🟢 Community Edition upload it to the Discord community, and also see what others have done!
Instructions
Bouncing Ball from the Top
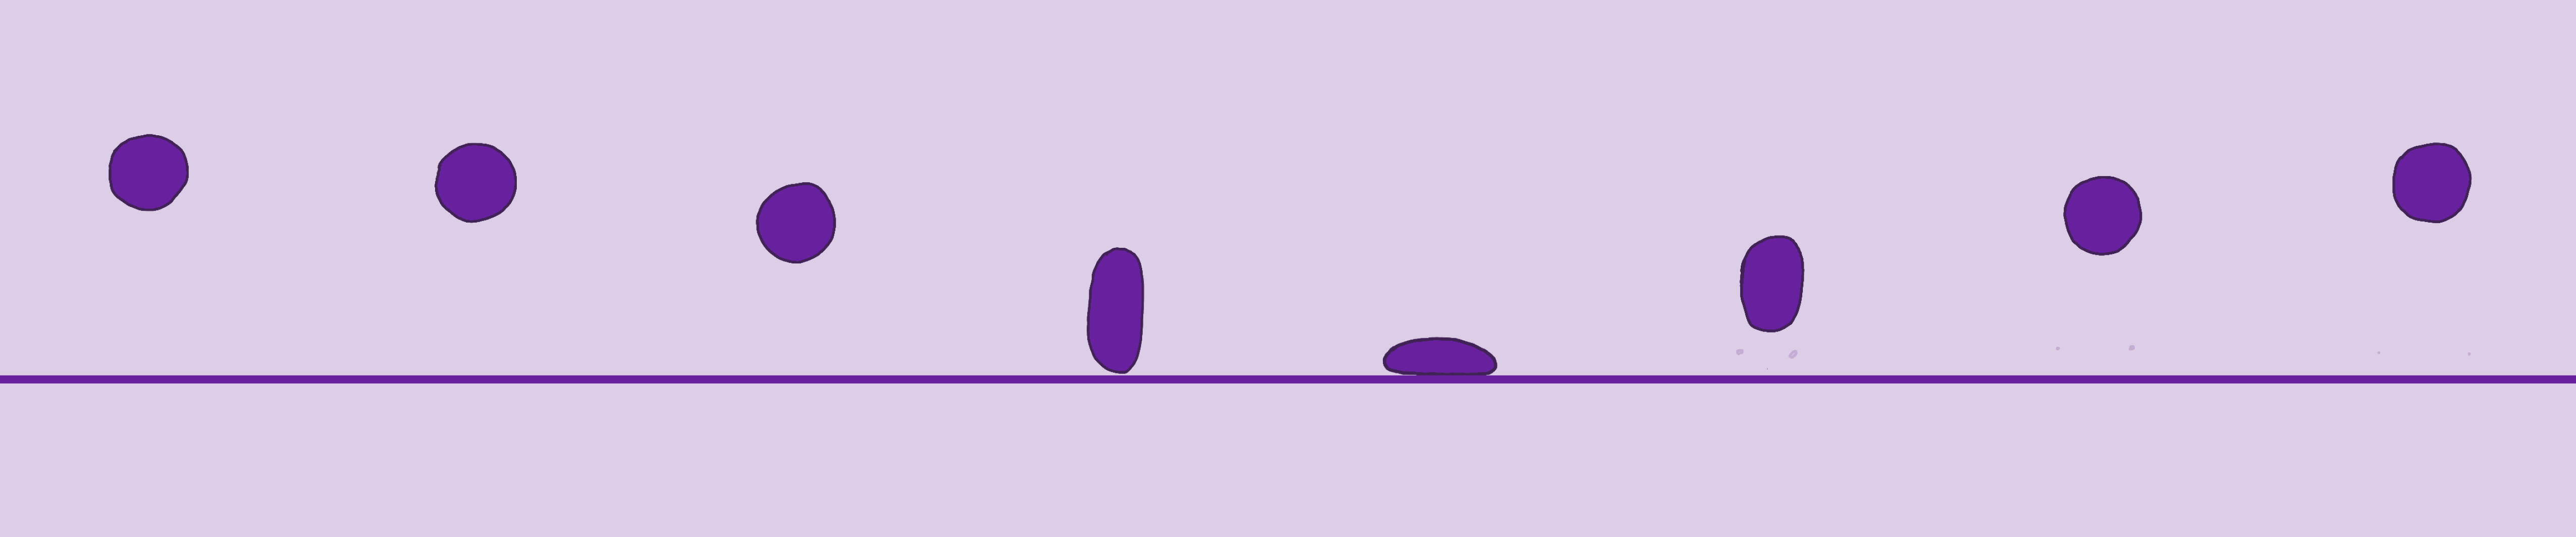
Take a look at this bouncing ball:
There are 8 unique drawings here. The drawings are played back in quick succession at a speed of 12 drawings per second. That creates the motion you see…
In animation, we call each drawing in a sequence a FRAME.
I am animating this exercise in 12 frames per second (12 FPS), meaning every second has up to 12 drawings.
You could also animate on 24 FPS. It’s the standard framerate for films you see in cinemas. The framerate has an influence on how smooth an animation feels.
Animating with 24 frames does not necessarily mean that you would need to draw every frame in a second, you can also HOLD every drawing for 2 frames or 3 frames, which would result in the same effect as having 12 FPS or 8 FPS. And animators usually refer to this as animating on Twos and animating on Threes.
I will mostly stick to 12 FPS, because it usually looks good enough and cartoony.
Planning Animations with Timing Charts
I would like to take the time to explain a common tool that is used by animators to plan the timing and spacing for animations — the Timing Chart:
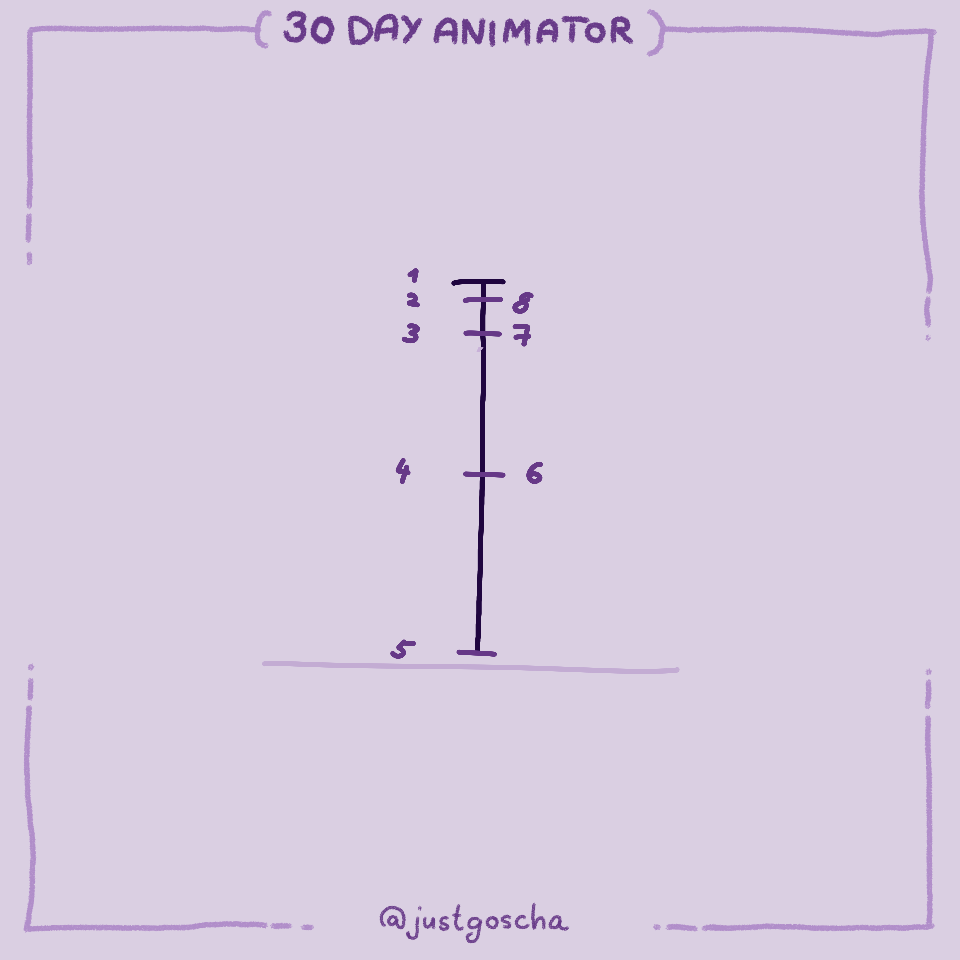
A timing chart illustrates the (relative) position in each frame of the moving object. Thereby it determines the
- TIMING = how long is the animation (how many frames does it take)
and the - SPACING = where is my object located in space
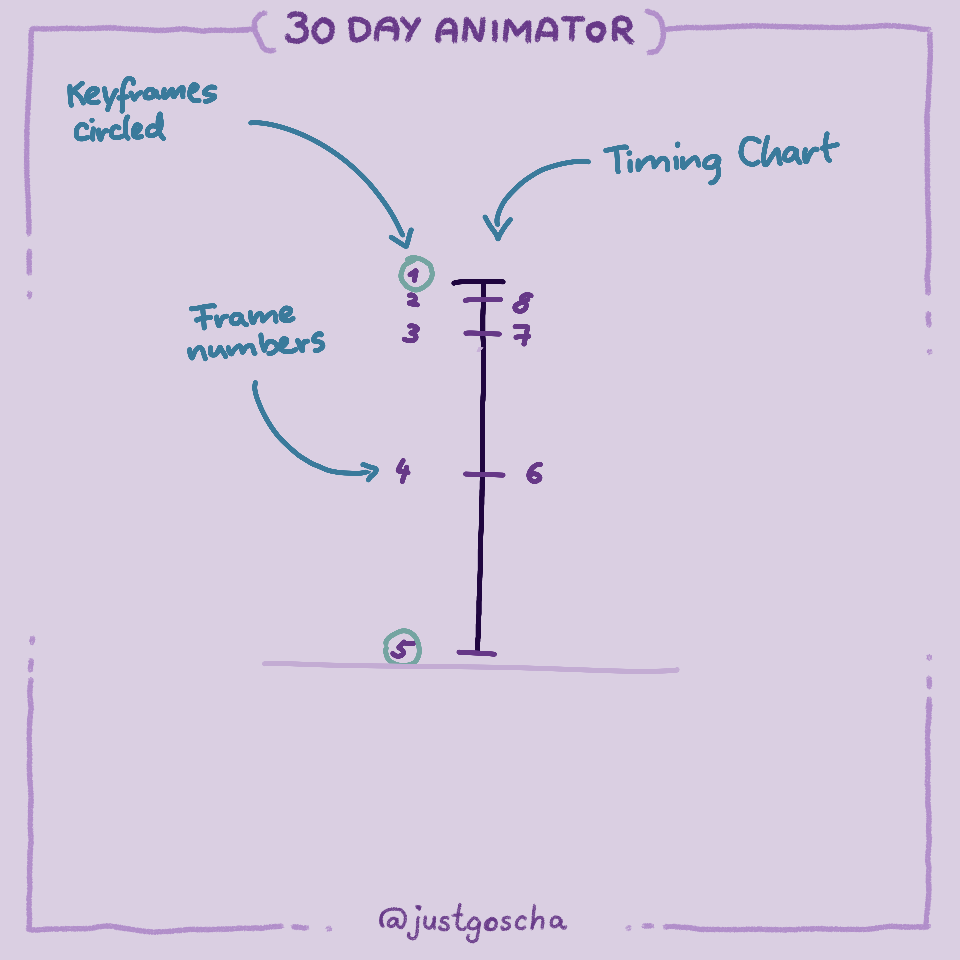
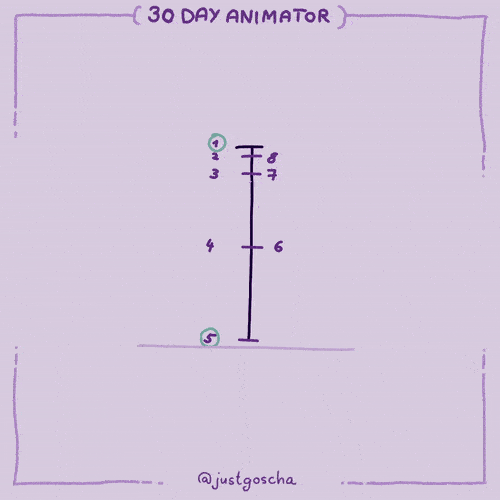
Keyframes (the frames that define the starting and ending positions) are usually circled in timing charts.
- 1 - the frame where the ball is highest
- 5 - the frame where the ball hits the ground.
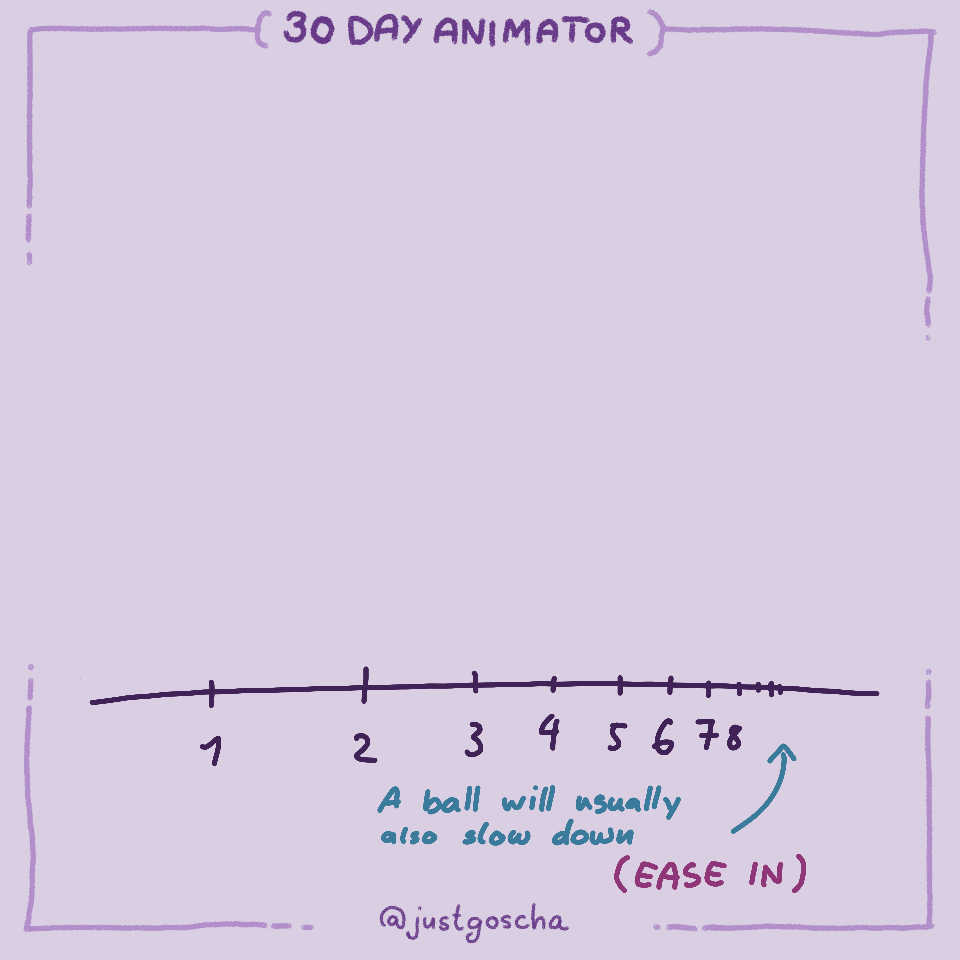
Easing — Speeding Up and Slowing Down
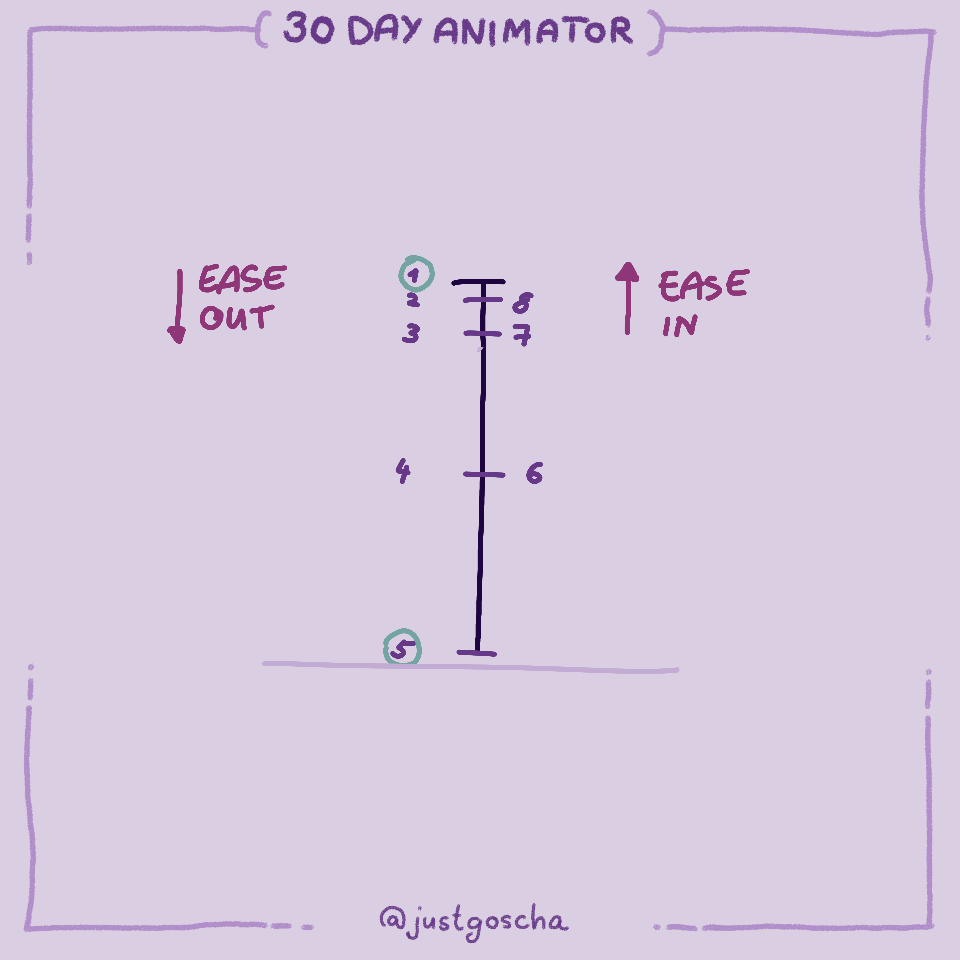
The frames at the top are closer together. The closer together an object is between frames, the slower it moves.
The spacing between the ball in the frames increases as it goes down. Gravity causes the ball to accelerate down. After it hits the floor it goes up fast again. Then gravity decelerates it again until it reaches the peak.
These common accelerations and decelerations are also often called EASING in animation.
- Acceleration = Ease Out = Speed up
- Deceleration = Ease In = Slow down
I still always confuse ease in and out 😅
You don’t need to create a timing chart for every animation, you also need to do it here. I just use it to plan out more complex animations than this or to communicate the spacing to someone else.
After this quick excursion, let’s now animate the ball on top of the timing chart.
Squash & Stretch
As we animate our bouncing ball we can make use of another fundamental animation principle — Squash & Stretch.
Those are two opposing effects that usually follow each other. When something comes to a dramatic stop, the force usually compresses the object and creates the Squash. If something accelerates or moves fast it creates a Stretch.
In our bouncing ball, we squash when it hits the ground. The stretch happens right before it touches the ground and right after when the ball is the fastest.
The more exaggerated you make this effect the more rubbery or elastic the object will look. If you keep the ball solid the entire time, it will look more like a golf or bowling ball.
💡 Try to keep the volume of the ball consistent even as you stretch it out.
That means as you stretch it, it should also get thinner.
When applied to characters, this effect can look very cartoony.
Bouncing Ball with Decaying Bounce
In the real world, the bounce can not continue forever. There are too many forces at play. It depends on the type of materials, weight, and elasticity of the ball, and the ground.
A bowling ball would bounce less than a basketball.
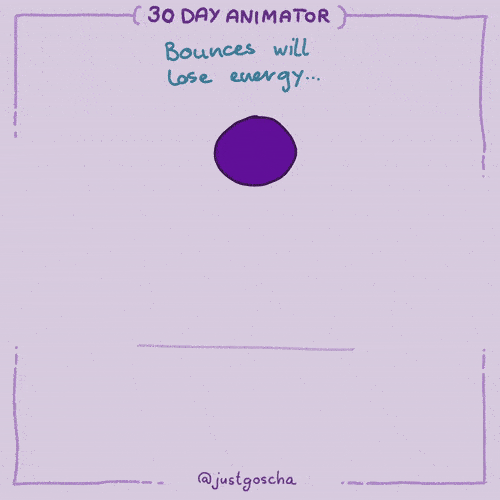
For this exercise, try to think of the properties of your ball and how it would behave.
You can re-use frames from your previous exercise and just draw the last part.
Bouncing Left to Right
The last thing I want you to do in this exercise is bounce a ball from left to right.
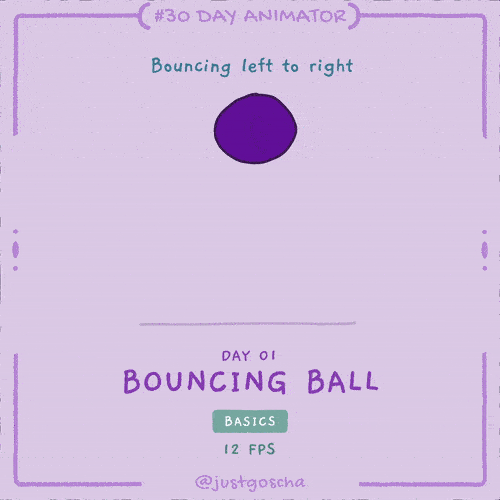
It’s not much different from the one before except that we introduce a new movement direction. Now we can see that the ball moves in an arc!
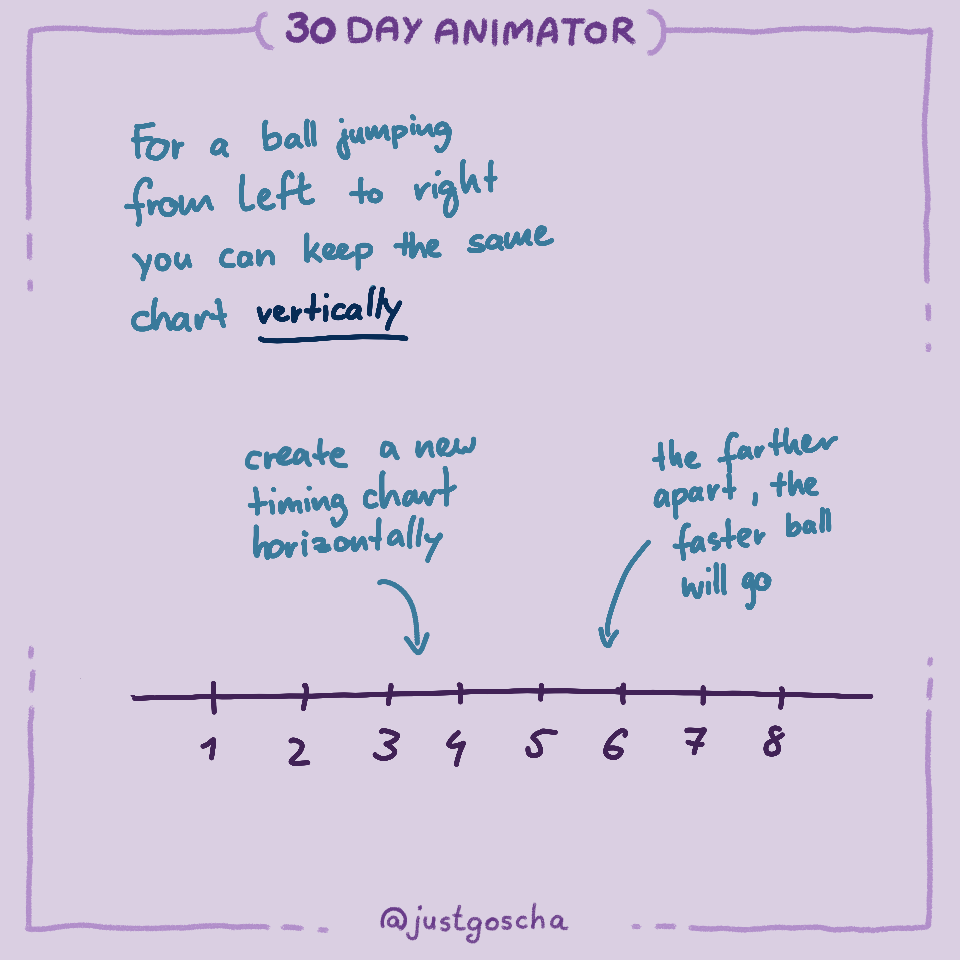
The important thing to know is that it moves from left to right at a constant speed. Or it could accelerate or decelerate. Either way, the horizontal speed is decoupled from the vertical jumping. You can think of it as two forces. There is the gravity that influences the jumping, and another force that influences the side movement.
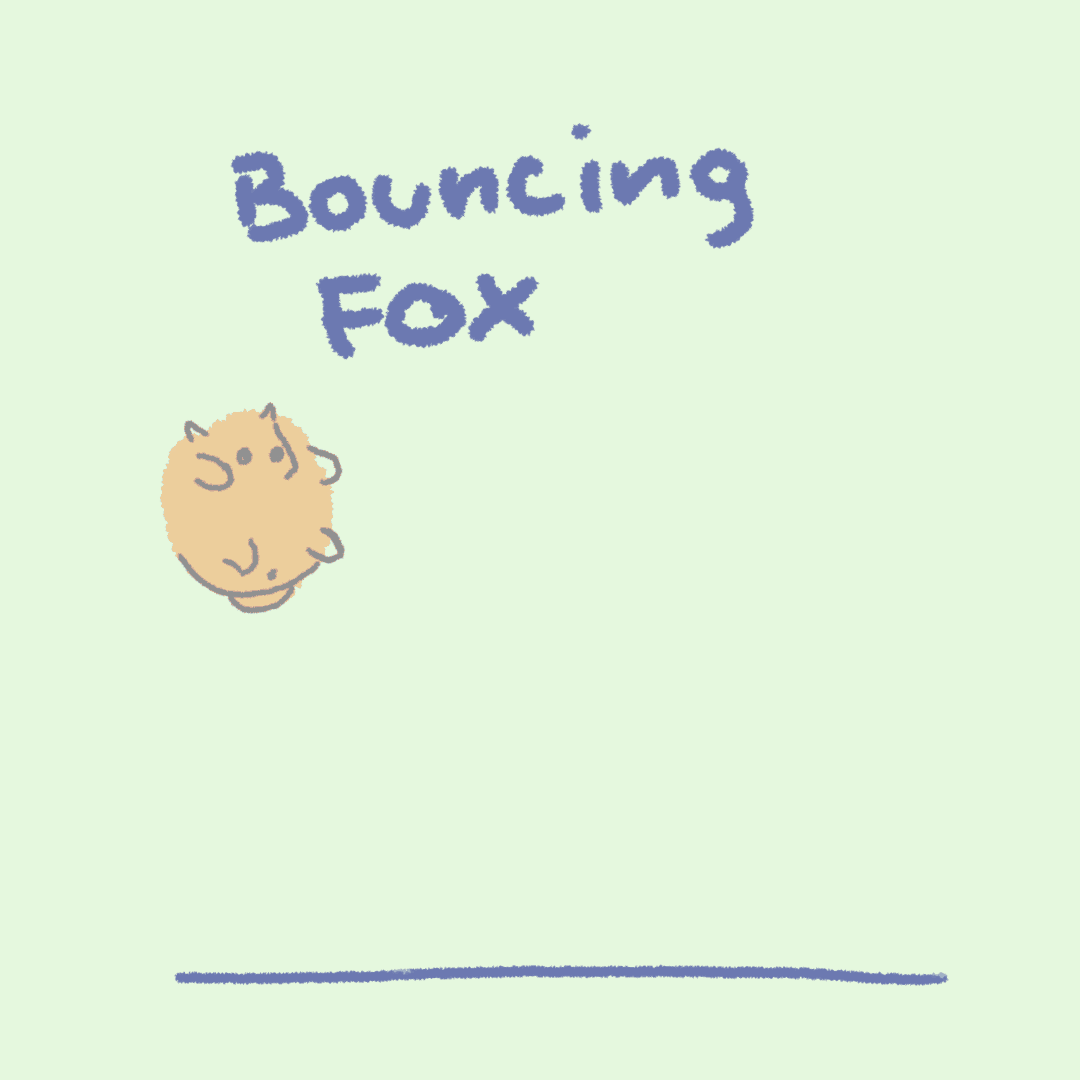
Advanced Variation
If you have enough of bouncing balls, try a fun variation. Make something else bounce. Like a cute animal:
Alright, this first exercise was really wordy, because I had to introduce many concepts. Don't worry if some went over your head. You will be able to practice them many times as we go through more exercises.
Happy animating!
🤗
Goscha